What Is Builder Gel?
A Beginner's Comprehensive Guide
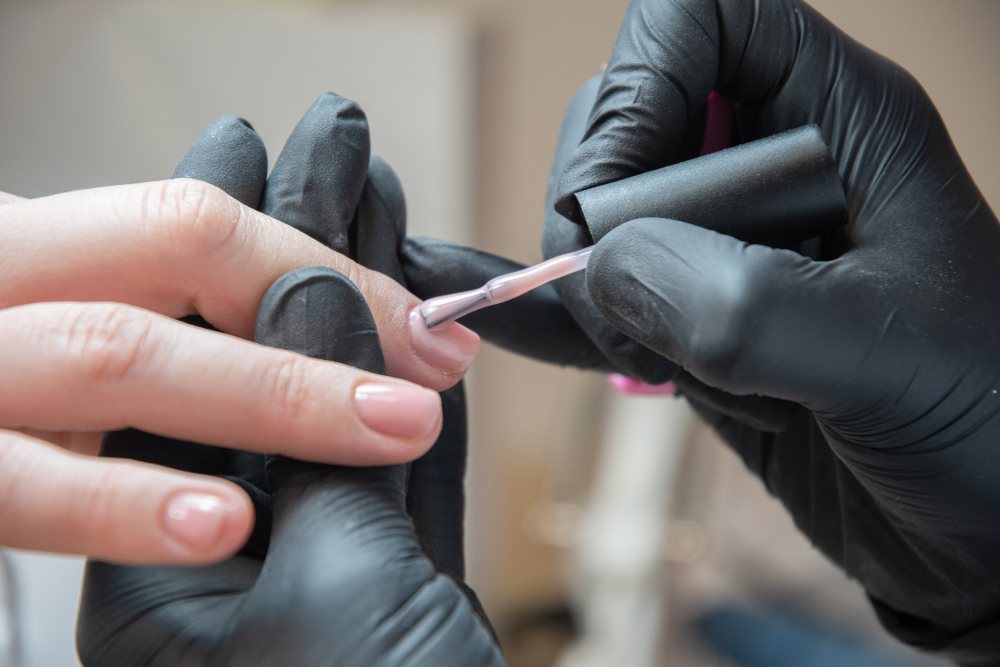
What is builder gel? Builder gel is a versatile nail enhancement product designed to add strength, length, and shape to natural nails. Unlike regular gel nail polish, builder gel is generally odourless and doesn't produce strong fumes, making it more pleasant to work with.
The application process involves coating the nails with a primer and a base coat, then adding the builder gel in an even layer before curing it under a UV or LED lamp.
Its flexibility allows nails to bend and bounce back without cracking or lifting, providing durability for up to five weeks. For beginners, builder gel presents an accessible introduction to DIY nail enhancements, simplifying the application process and ensuring a durable and versatile solution.
Understanding What Is Builder Gel
Builder gel is a versatile product used in nail enhancements. It offers strength, flexibility, and a protective layer for natural nails or nail extensions.
Distinguishing Types of Gel: Soft Gel vs. Hard Gel vs. Builder Gel
To better understand the difference between builder gel and other gels, it's important to know that builder gel has a higher viscosity compared to traditional gel polish. This allows it to create a stronger structure for the nails.
- Soft Gel is designed for natural nails and is typically used for basic overlays. It is flexible and can be easily soaked off with acetone.
- Hard Gel is more robust and is used to create extensions or repairs. This type of gel is not removable with acetone and requires filing down.
- Builder Gel stands out due to its thick consistency. It can be used to add strength and length to natural nails or extensions. Unlike soft gel, builder gel provides a more durable and long-lasting finish, offering better support and a protective layer. Nail builder gel can be used to sculpt and strengthen either natural nails or nail extensions, offering endless possibilities for custom nail art and a long-lasting gel manicure.
- Builder in a Bottle is a convenient form of builder gel that simplifies the application process. It combines the strength and durability of traditional builder gel with the ease of use of a polish bottle, making it an excellent choice for both professionals and DIY enthusiasts.
Additionally, the application process of builder gel involves curing under a UV nail lamp, which ensures a hard and resilient finish. Does builder gel last longer than other gels? Yes, it generally offers superior durability and can maintain its integrity for several weeks, making it a preferred choice for those seeking a long-lasting nail solution.
Ready to experience the benefits of builder gel for yourself? Visit Diamond Nail Supplies to explore our range of high-quality builder gels and elevate your nail care routine.
Components of Builder Gel and Their Functions
Builder gel is composed of monomers and oligomers. These elements work together to form a strong, durable layer when cured under a UV or LED lamp.
Monomers are single molecules that link to form polymers, providing the gel with its strength. Oligomers are short chains of monomers; they enhance the flexibility and bonding properties of the gel.
Builder gel also includes photoinitiators, which trigger the curing process when exposed to UV or LED light. This ensures the gel hardens correctly to a clear, strong finish.
Preparation for Application

To ensure builder gel adheres properly and creates a durable manicure, thorough nail preparation and the right base coat are essential. Each step contributes to a smoother application and longer-lasting results.
Proper Nail Preparation Techniques
Properly preparing natural nails is the first step toward achieving a long-lasting manicure with builder gel. The process begins with washing and drying hands thoroughly to remove any oils. Here are the key steps for effective nail prep:
- Push back cuticles using a cuticle pusher or orange stick to ensure the gel doesn't lift. This step is crucial for preventing premature lifting and maintaining a clean application area.
- Shape the nails with a file, focusing on the desired length and contour. Shaping ensures a smooth, even surface for the gel to adhere to.
- Buff the nail bed lightly to remove shine. Use a gentle buffer to avoid damaging the natural nail, which is essential for the builder gel to bond correctly.
- Apply a thin layer of primer to help the builder gel adhere better. Priming is vital for the longevity and durability of the gel product.
Thoroughly cleaning the nail is crucial to prevent lifting or peeling. Proper preparation not only ensures a strong foundation for the builder gel but also supports nail growth and maintains a good nail care routine.
Choosing the Right Base Coat
Selecting the appropriate base coat is essential for improving the durability and adhesion of the builder gel, ensuring a long lasting manicure. When choosing a base coat:
- Consider the specific requirements of the builder gel being used. Some gels may have recommended base coats for optimal results, especially those with thicker viscosity.
- Apply a thin layer of base coat, ensuring full coverage without pooling near the cuticles. Use a nail brush to spread it evenly and achieve a smooth finish.
- Cure the base coat under an LED lamp for 1-2 minutes or under a UV lamp for 2 minutes to secure the base layer. Proper curing is critical for a flawless builder gel application.
By choosing the right base coat and applying it correctly, you set the stage for a flawless builder gel application, essential for achieving hard gel nails with a durable and long-lasting finish.
Application of Builder Gel
Applying builder gel involves following a structured process to ensure optimal results. Whether using a pot with a brush or builder in a bottle, achieving the perfect nail shape and structure is essential.
Step-by-Step Application Process
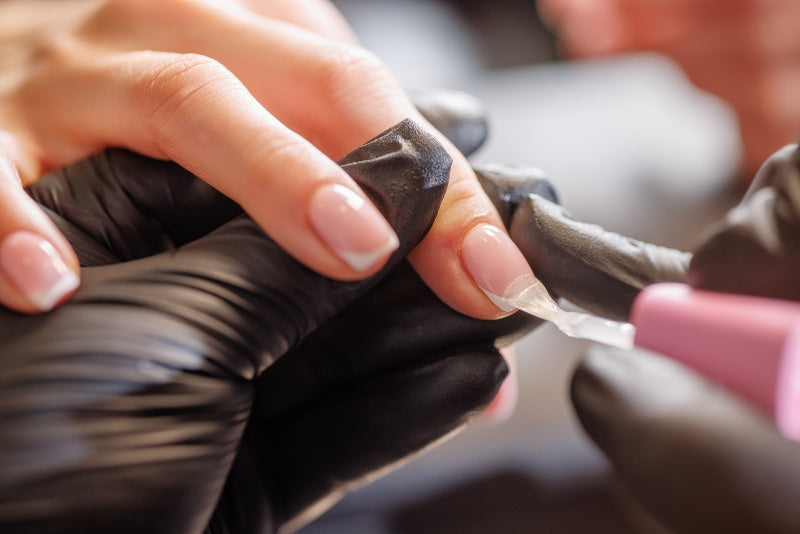
Start with clean, prepped nails by removing any old polish and gently pushing back the cuticles. Shape and file the nails to the desired length and form. Use a nail buffer to remove the natural shine, ensuring a clean surface for the builder gel.
Apply a thin, even layer of base coat to the nails and cure it under a UV or LED lamp. Following this, pick a small amount of builder gel with a brush from the pot. Begin at the cuticle area and gently brush the gel towards the free edge, ensuring even coverage. Self-levelling properties will help smooth the gel. Cure under the lamp again.
For additional strength and structure, apply a second layer of builder gel, focusing on building the apex. Once cured, shape and file the nails to achieve the desired finish.
Cure once more before applying a top coat to seal and protect the builder gel.
Utilising Builder in a Bottle for Easy Gel Polish Application
Builder in a bottle simplifies the builder gel application process, making it ideal for both professionals and DIY enthusiasts.
- Begin by prepping the nails as previously described, ensuring they are clean and free from oils.
- Apply a thin layer of base coat and cure it under a UV or LED lamp to set a solid foundation.
- Using the builder in a bottle, apply a thin layer of gel directly from the bottle's brush.
- Start at the cuticle and stroke towards the nail tip to ensure even coverage.
- Cure this layer under a UV or LED lamp. For additional structure, apply another layer, focusing on building the nail's apex for added strength. The self-levelling properties of builder gel help achieve a smooth, professional finish. It is best to use a lamp with a low heat setting, such as the Gella Basic Lamp, to avoid heat spikes, especially for Builder in a Bottle (BIAB).
- Cure the nails again under the lamp.
To maximise durability, shape and file the nails to the desired structure before applying a top layer of top coat to seal and protect the builder gel. This not only enhances shine but also ensures the builder gel lasts.
With proper application and care, builder gel can maintain its integrity for two to three weeks or even an extended period, providing a resilient and beautiful manicure.
Achieving the Ideal Nail Shape and Structure
Achieving a professional finish with builder gel hinges on meticulous shaping and structuring of the nails. Once the builder gel is applied and cured, use a high-quality file to refine the shape, focusing on the free edge and sides to ensure a clean, even look.
Building the apex is crucial for both strength and aesthetics. This process involves creating a subtle curve on the nail's surface to provide extra strength, especially for longer nails. The apex should be positioned slightly back from the centre of the nail, ensuring optimal support and a natural appearance.
Using nail forms can significantly aid in achieving the perfect shape and length effortlessly. If the builder gel tends to self-level too much, it's essential to refine by shaping and filing post-cure.
This attention to detail makes a significant difference in the final result. Always finish with a top coat to add shine and protection, enhancing the durability of the manicure and ensuring that the nails remain pristine and beautifully painted.
For the best results, explore our range of professional nail files and top coats to perfect your manicure process.
Key Takeaways:
- Meticulous Shaping: File nails after curing builder gel for a refined look.
- Apex for Strength: Build an apex for strength and aesthetics on longer nails.
- Nail Forms: Utilise forms to achieve desired shape and length effortlessly.
- Refining: If builder gel self-levels excessively, shape and file post-cure.
- Finishing Touches: Apply a top coat for shine and protection.
Curing and Sealing the Gel

Curing and sealing builder gel involves precise use of LED/UV lamps and application of a gel top coat to protect and enhance the longevity of your nails. This ensures a strong, resilient finish that maintains the desired nail shape and length.
Applying the Gel Top Coat for Protection
After curing the builder gel, a gel top coat is applied to seal and protect the nails. This top coat not only adds extra shine but also protects against daily wear and tear, preserving the designed look for a longer period.
Application involves using a clean gel brush to spread a thin, even layer over the cured builder gel. Ensure the edges and tips of the nails are also coated accurately to prevent chipping.
Once applied, cure the top coat under the LED or UV lamp. Similar to builder gel curing, follow the specific times recommended by the manufacturer. Properly cured top coats give the nails a glossy, durable finish, completing the process.
Regular use of cuticle oil after curing can help maintain nail health, adding to the overall resilience and longevity of builder gel nails.
Understanding Curing Time and Correct Usage of LED/UV Lamp
Curing is a critical step in applying builder gel. It involves using either an LED or UV lamp to harden the gel. Builder gel typically requires different curing times based on the lamp type.
LED lamps usually cure quicker, taking about 30-60 seconds per layer, while UV lamps may need 2-3 minutes. Always refer to the manufacturer’s instructions for the exact curing times for your specific product. As stated earlier, it is best to use a lamp with a low heat setting, to avoid heat spikes, especially for Builder in a Bottle (BIAB).
Correct usage of these lamps is essential. Position your nails properly under the light, making sure each part of the nail gets exposed evenly to avoid any under-cured spots, which might make the gel weak or prone to breaks.
Regular maintenance and replacement of your lamp bulbs, especially for UV lamps, ensure effective curing. Poorly functioning bulbs can result in uneven curing, affecting nail durability.
Ready to Master the Art of Builder Gel?
Elevate your nail game with Diamond Nail Supplies AU's premium selection of builder gels. From beginners to pros, we have the perfect products to create flawless, long-lasting manicures. Explore our builder gel collection today.
Nail Enhancement Techniques For Builder
Nail enhancement techniques using builder gel can include lengthening natural nails with extensions and tips, as well as creating aesthetic nail art for a polished and beautiful look.
Lengthening with Nail Extensions and Tips
Builder gel is ideal for lengthening natural nails. By using extensions and tips, one can achieve longer nails. This involves applying artificial nail extensions or tips onto the natural nail and then using builder gel to solidify and secure them.
Extensions are often made from materials like plastic or gel forms. Forms are used as a base to shape the nail extension, allowing for customisable length and shape. Once the extensions or tips are in place, layers of builder gel are applied and cured under a UV or LED lamp. This creates a strong and durable bond.
It's crucial to ensure proper placement of extensions and tips to prevent lifting and maintain natural-looking nails. This technique allows for a variety of lengths and shapes, making it versatile for different preferences and styles.
Creating Aesthetic Nail Art on Natural Nails
Builder gel provides a strong canvas for intricate nail art, offering unmatched versatility for creating creative and detailed designs that wouldn't be possible with standard nail polish. Once the desired nail length and shape are achieved, nail art can be applied on the surface. This can include colourful designs, patterns, or embellishments such as rhinestones and glitter. The thick consistency of builder gel aids in securely holding these decorations in place.
To ensure the longevity of the nail art, it is vital to apply and cure the final layer of builder gel. This step seals the art and adds a glossy finish, keeping it fresh and intact for weeks. The robustness of builder gel supports more complex designs without the risk of chipping or fading. This makes it an ideal choice for those seeking to elevate their nail art with durable and intricate embellishments.
Maintaining Builder Gel

Proper maintenance ensures builder gel remains durable while promoting natural nail health and growth.
Regular Maintenance for Long-Lasting Results
Maintaining builder gel is straightforward but requires consistency. Nails should be checked weekly for any signs of lifting or chipping. If any issues arise, they should be addressed immediately to prevent further damage.
Regularly applying cuticle oil keeps the nails and surrounding skin moisturised. This prevents dryness and promotes healthy nail growth. Additionally, it's essential to avoid using nails as tools to prevent breakage.
A top coat should be reapplied every two weeks. This helps to maintain the shine and durability of the builder gel. For professional maintenance, it is recommended to visit a nail technician monthly to ensure the best results.
Managing Natural Nail Health and Growth
Builder gel can significantly support natural nail health when used correctly. Begin with a clean and primed nail surface before application to ensure better adhesion and longevity of the nail builder gel. Maintaining a balanced diet rich in vitamins and minerals is essential, as it supports nail growth from within. Key nutrients such as biotin, vitamin E, and omega-3 fatty acids play a vital role in strengthening nails and promoting healthy growth.
To prevent brittleness, avoid excessive exposure to water and harsh chemicals. Wearing gloves during household chores is a simple yet effective way to protect nails from potentially damaging substances. Additionally, taking biotin supplements has been shown to enhance nail strength and growth, making it a valuable addition to your routine.
Routine trimming of nails keeps them at a manageable length and helps prevent breakage. It’s also crucial to allow periodic breaks from builder gel to let natural nails recover, minimising the risk of overuse and potential thinning. This balanced approach ensures that your nails remain strong, healthy, and well-maintained over time.
For the best results, use high-quality builder gel products. Our selection of premium gels and nail care products will help you achieve and maintain beautiful, healthy nails effortlessly.
Key Takeaways:
- Preparation: Clean and prime nails before applying builder gel.
- Nutrition: Maintain a balanced diet with key nutrients for nail growth.
- Protection: Minimise exposure to water and chemicals; wear gloves.
- Biotin: Consider biotin supplements for enhanced nail strength and growth.
- Trimming: Trim nails regularly to prevent breakage.
- Breaks: Allow periodic breaks from builder gel for natural nail recovery.
Repair and Removal of Builder Gel
Safe removal techniques and effective repair strategies are essential for maintaining nail health when using builder gel. Proper removal ensures the nails remain healthy and prevents damage while knowing how to address common issues like breakage can prolong the life of your gel manicure.
Techniques for Safe Removal of Builder Gel
To remove builder gel safely, gather acetone, cotton balls, aluminium foil, and an e-file. Start by gently roughening the surface of the nail builder gel with a coarse nail file. This step allows the acetone to penetrate more effectively.
Next, saturate cotton balls with acetone, ensuring they are wet but not dripping. Place these acetone-soaked cotton balls directly on top of the nails. Secure them by wrapping each fingertip with a small piece of foil. Allow the acetone to work for about 10-15 minutes.
After this period, check if the gel has softened. If it has, use an orangewood stick or a cuticle pusher to gently lift and remove the nail builder gel. In cases where stubborn gel remains, repeat the soaking process. Finally, buff the nails lightly to remove any residual product and restore a smooth finish.
Key Takeaways:
- Gather Supplies: Acetone, cotton balls, foil, coarse file, orangewood stick/cuticle pusher.
- Roughen Surface: Gently file the surface of the builder gel.
- Acetone Soak: Soak cotton balls in acetone and apply them to nails, wrapping them in foil.
- Wait & Check: Allow 10-15 minutes for gel to soften, then check.
- Gently Remove: Use an orangewood stick or cuticle pusher to lift and remove the gel.
- Repeat if Needed: If gel remains, repeat the soaking process.
- Buff & Finish: Lightly buff nails to remove residue and smooth the surface.
Repairing Breakage and Other Common Issues
Addressing breakage involves using the same builder gel to fill in and repair damaged areas. Begin by lightly buffing the nail surface and cleaning any dust or debris. Apply a thin layer of builder gel to the break, ensuring it covers the damaged area completely.
Curing the gel under a UV or LED lamp for the recommended time is crucial. This step secures the repair and provides added strength. For severe breakages, consider applying an additional layer of builder gel, then cure again to ensure durability. Using an e-file can also help smooth out the repair, creating a seamless blend with the natural nail. Follow up with a top coat to protect the repair and add a glossy finish. Making these repairs promptly can prevent further damage and maintain the appearance of well-groomed nails.
Ensuring proper builder gel removal and repair techniques not only maintains nail health but also enhances the longevity and look of your gel manicure.
Key Takeaways:
- Preparation: Buff the nail surface and clean any debris.
- Apply Builder Gel: Cover the damaged area with a thin layer of builder gel.
- Cure: Cure under UV/LED lamp for the recommended time.
- Additional Layer (If Needed): For severe breaks, apply and cure another layer.
- Smooth with E-file: Use an e-file to blend the repair seamlessly.
- Top Coat: Apply a top coat for protection and shine.
- Prompt Repair: Fix breaks quickly to prevent further damage.
Aftercare and Nail Health When Using Builder

Maintaining builder gel nails calls for a dedicated aftercare routine to ensure they stay healthy and strong. Hydration and regular treatment are critical for keeping the nails in good condition and preventing brittleness.
Hydration and Treatment Post-Application
Hydration is fundamental once builder gel has been applied. Regular use of cuticle oil is recommended to keep the cuticles and nails hydrated. Applying cuticle oil daily can prevent the nails from becoming brittle and dry.
Incorporating a nail care routine that includes gentle filing and buffing helps maintain the shape and smoothness of the nails. It’s best to avoid aggressive filing, which can weaken the nails.
Strengthen the nails by using a nail treatment product formulated specifically for builder gel nails. Look for treatments with nourishing ingredients like keratin or biotin. These ingredients strengthen and support nail health, reducing the risk of breakage.
For optimal results, it’s crucial to avoid using the nails as tools and always wear gloves when doing household chores. This protects the nails from harsh chemicals and excessive water exposure, ensuring longevity and health. Regular application of nail treatments will help maintain the durability and appearance of your builder gel nails.
Additionally, incorporating a biotin supplement can further support nail strength from within. A balanced diet rich in vitamins and minerals also promotes healthy nail growth.
By following these aftercare tips, your builder gel nails can remain beautiful and resilient, allowing you to enjoy the benefits of this versatile nail enhancement for an extended period.
Key Takeaways:
- Hydration: Use cuticle oil daily to prevent brittleness.
- Nail Care: Gentle filing and buffing maintain shape and smoothness.
- Nail Treatments: Use products with keratin or biotin to strengthen nails.
- Protection: Avoid using nails as tools and wear gloves for chores.
- Supplements: Consider biotin supplements and a balanced diet for nail health.
PRO TIP: Cuticle oil is your best friend! Apply it daily to keep nails hydrated and flexible, reducing the risk of breakage.
The Benefits of Builder Gel in Nail Care
Builder gel has revolutionised nail care, offering a multitude of benefits that cater to both professionals and beginners. Its unique formulation and versatile application make it an indispensable product for achieving beautiful, strong, and long-lasting nails. Here’s why builder gel is a standout choice for your nail enhancement needs.
Strengthen and Protect
Builder gel is specifically designed to strengthen and protect nails. It forms a robust layer over natural nails, preventing breakage and damage. This protective barrier ensures that your nails remain healthy and resilient against everyday wear and tear.
Durability
Known for its exceptional durability, builder gel can last for weeks without chipping or peeling. This ensures that your manicure stays flawless and intact, providing long-lasting results that outshine regular gel nail polish.
Natural Look
One of the standout features of builder gel is its ability to provide a natural look. Unlike some nail enhancements that can appear thick and artificial, builder gel can be sculpted and shaped with precision, ensuring your nails look elegant and realistic.
Versatility
Builder gel is incredibly versatile, suitable for adding length, thickness, and structure to both natural nails and nail extensions. Whether you want a subtle enhancement or dramatic nail art, builder gel is a fantastic choice for various styles and preferences.
Enhanced Manicure
A manicure with builder gel not only looks stunning but also promotes better nail health. The protective layer minimises the risk of splitting and peeling, making it ideal for regular use and ensuring your nails remain strong and beautiful.
Longevity
When applied correctly and maintained properly, builder gel offers remarkable longevity. It can last up to five weeks, significantly reducing the need for frequent salon visits and allowing you to enjoy a long-lasting, impeccable manicure.
Easy to Use
Available in various forms such as hard builder gel and liquid builder in a bottle, this product is user-friendly for both professionals and DIY enthusiasts. Its ease of use allows for effortless shaping and a smooth, consistent finish, making nail enhancement accessible to everyone.
For more details, you can refer to the guide on Dan's Nails or explore a comprehensive explanation at Nails By Beckie.
DIY Application and Professional Tips
Applying builder gel at home can be effective if done correctly, but understanding when to seek professional help can ensure the best results. Here are some practical tips to help you along the way.
Expert Tips for At-Home Application
For those attempting a DIY application, preparation is key. Thoroughly clean nails to remove oils and dirt. Opt for a thin base coat, curing it under an LED lamp for about 1-2 minutes or a UV lamp for 2 minutes.
When applying the builder gel, use a nail brush to apply a small amount in the centre, then spread it towards the edges. This technique ensures even coverage. For the best results, cure the gel under the appropriate lamp and repeat if needed for added strength and thickness.
Avoid over-buffing the natural nail before application as this can weaken it. Lastly, ensure the nails are completely cured after each layer to prevent lifting.
When to Seek Professional Application
While DIY can be convenient, some scenarios call for professional intervention. Seek out a professional if you have naturally weak or damaged nails, as improper application can exacerbate these conditions.
Professionals also provide expertise in achieving complex designs or specific shapes that may be challenging at home. They utilise high-grade products and equipment to maximise durability and finish quality.
If you encounter frequent issues like lifting, cracking, or uneven layers, it’s best to consult a nail technician. They can address underlying problems and offer insights into maintaining your builder gel nails effectively. For those requiring intricate or long-lasting results, professional application is often the preferred choice.
Comparing Builder Gel to Alternatives
When comparing builder gel to other nail enhancement options, consider factors such as durability, flexibility, and application techniques. This guide will help you understand the differences between these products to make an informed decision.
Builder Gel vs. Acrylics: A Comprehensive Comparison
Builder gel is a gel-based product that can be used to sculpt and strengthen natural nails or extensions. It is odourless and flexible, making it pleasant to work with.
Acrylics are a combination of liquid monomer and powder polymer that create hard, durable nails. They can be quite strong but often have a strong odour during application.
- Durability: Both builder gel and acrylics offer strong, long-lasting nails. Builder gel can last for up to five weeks without chipping, while acrylics are known for their toughness.
- Flexibility: Builder gel is more flexible than acrylics, which means it can bend without breaking. This makes it less prone to lifting and chipping compared to the more rigid acrylic nails.
- Application and Removal: Builder gel requires curing under a UV or LED lamp, while acrylics harden through a chemical reaction. Acrylics can be soaked off using acetone, whereas builder gel needs to be filed off or soaked depending on the type.
Builder gel is suitable for those seeking a flexible, nearly odourless option, while acrylics are best for those needing exceptionally robust nails.
When to Choose Regular Gel or Shellac Over Builder Gel
Regular gel polish offers a glossy finish and is cured under a UV or LED lamp, similar to builder gel. It is great for those who want a durable, chip-resistant nail polish that lasts up to two weeks.
Shellac is a hybrid between regular nail polish and gel polish. It also requires curing but can be removed easily by soaking in acetone.
- Durability: Builder gel offers superior strength and longevity, making it ideal for nail enhancements like extensions. Regular gel and Shellac are better for those looking for a polished finish rather than extensions or added strength.
- Soak Off: Shellac and regular gel soak off more easily compared to builder gel. This makes them more convenient for those who frequently change their nail look.
- Chipping: Regular gel and Shellac are less likely to chip compared to traditional nail polish, but builder gel offers the longest-lasting protection against wear and tear.
Choose regular gel or Shellac if you prefer ease of removal and a polished look. Opt for builder gel for extended wear and strength.
Wrapping Up

Builder gel is a game-changer in the world of nail care, offering unparalleled strength, durability, and versatility. Whether you are a professional nail technician or someone who loves DIY nail art, builder gel provides a reliable and long-lasting solution for all your nail enhancement needs. With its ability to strengthen and protect natural nails, offer a natural look, and ensure an enhanced manicure, builder gel stands out as a superior choice.
Ready to transform your nail care routine? Explore our premium selection of builder gels at Diamond Nail Supplies. We offer top-quality products that cater to both professionals and beginners, ensuring you have everything you need for a flawless manicure. Visit Diamond Nail Supplies today and elevate your nail game to the next level!